Large format tiles are those with at least one side greater than 60cm in length. They come in various sizes and thicknesses, with some formats reaching dimensions of up to 3.2m x 1.6m. They are usually made from porcelain and, as such, have a low rate of absorbency. Slim tiles are around 3-5mm thick in formats up to 1m x 3m. They may be reinforced with glass fibre mesh backing.
Large-size tiles allow an almost seamless surface. Handling and moving large format tiles require more people and the use of tools with special suckers. Particular care must be taken when handling these tiles to avoid warpage and chipping the corners.
An advantage of thin tiles is the lower weight of this type of tile compared to traditional tiles, which means less impact on the structure, a characteristic which makes it the preferred choice for installing on vertical surfaces, especially facades. However, their reduced thickness means that certain precautions need to be taken during handling, when preparing substrates and bonding of tiles.
Let’s take a look at some points to look out for to ensure successful installation of large format and slim tiles.
The installation substrate must be as levelled and flat as possible. To install large-size tiles, the flatness and accuracy of the substrate must be within 1.5mm with a 2m straight-edge. Any areas not within this tolerance must be repaired before commencing installation. In addition, the substrate must be sound with no cracks, cured and dimensionally stable and clean.
As the size of the tiles increase, the risk of the tile not fully in contact and covered with the adhesive bed may be higher and therefore the use of adhesives with high wetting capability is ideal. In this way, gaps are not created that could otherwise affect the soundness and durability of the bond.
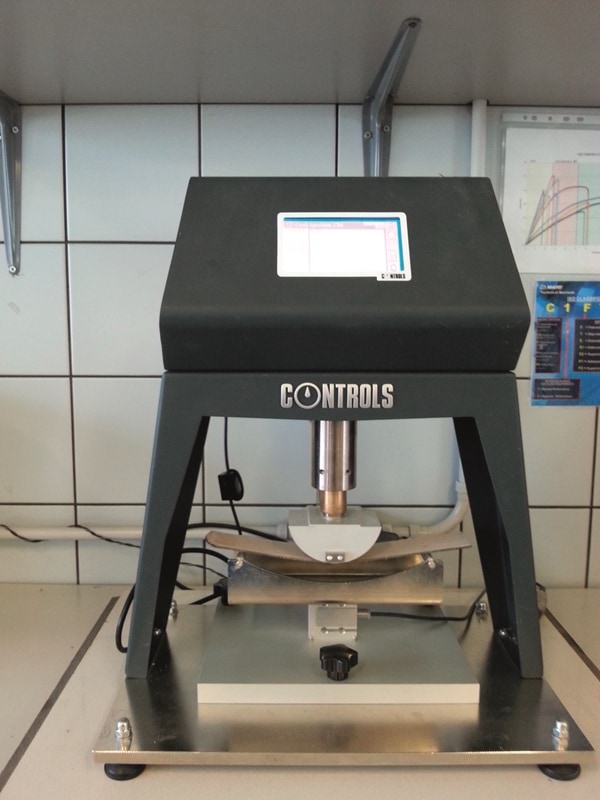
In addition, improved adhesives under class C2 with deformable properties of Class S1 or S2 in accordance with EN 12004 & ISO 13007-1 are recommended for installing this type of tiles. Refer to our article on Understanding Tile Adhesives and their Standards for more information. The deformability of the adhesive is determined through flexural tests which measures transverse deformation. To achieve Class S1, deformability of the sample must be at least 2.5 mm and for Class S2, it must be at least 5 mm. Ultimately, the type of adhesive depends on the type of substrate material, type and size of the tiles and the area of use.

Measuring the deformabillity of cementitious adhesive

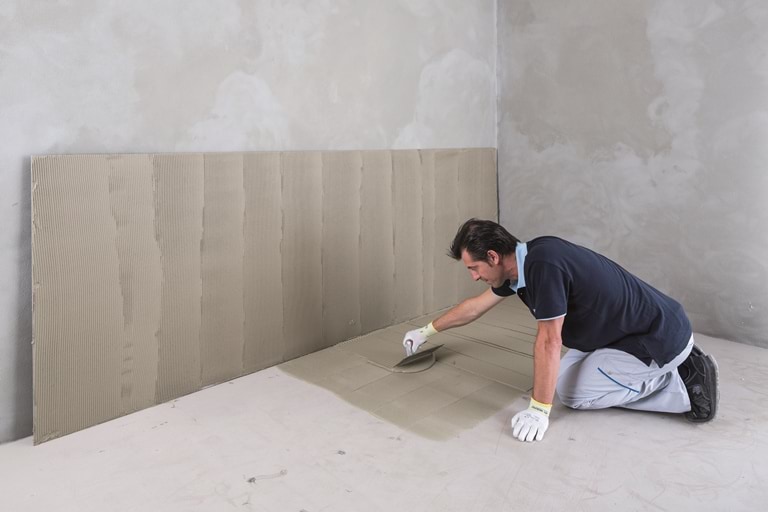
Tile adhesive is spread in the same direction on the back of the tile and on the substrate
Tiles must be installed on a compact bed of adhesive. It is recommended to use the double-buttering technique when applying the adhesive. Likewise, for thin porcelain slabs, this technique is recommended as gaps may form potential weak points in the tiling that could easily fracture.
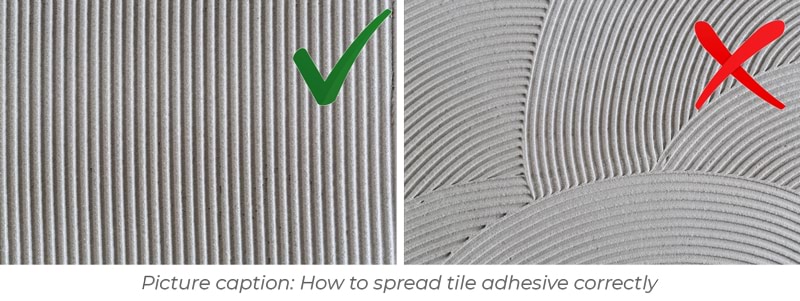
Double-buttering technique, that is, applying the adhesive with a steel notched trowel on both the substrate and on the back of the tile, must be used. The adhesive should be spread on the substrate and back of tile in the same direction. The adhesive must be applied in straight lines parallel to the short side of the tile to reduce the distance travelled by the air being pushed out. This will ensure that gaps are not created that could otherwise affect the soundness and durability of the bond.

How to spread tile adhesive correctly on large tiles
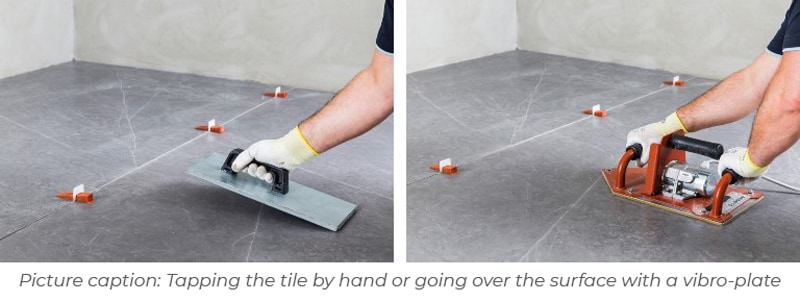
The sheer size of the tiles may lead to the formation of air pockets between the substrate and the back of the tile. This is why it is important to go over the tile surface by tapping them with a rubber spreader or vibro-plate, particularly when installing tiles on external substrates where water may collect in the gaps.

Tapping the tile by hand or going over the surface with a vibro-plate
The grout line between each tile must be at least 2 mm wide and must be increased according to the size and type of the tiles, the area of use (floor or wall tiles, internal or external) and the stresses expected when in service. It is recommended to use spacers between the tiles to ensure the correct gap between each tile.
Queries? Contact Mapei Singapore for consultation or your project needs.
____
About Mapei:
Founded in Milan in 1937, Mapei is today a world leading producer of adhesives and complementary products for the laying of all types of floor, wall and coating materials. Mapei’s specialty lies in products for ceramics and stone materials, among other product lines. Mapei’s adhesives for tiles and stones are certified according to international standards and are SGBC certified. Experience proven by numerous notable projects worldwide.
June 17, 2020. 6:44 AM
October 28, 2020. 2:19 AM
September 11, 2020. 8:59 AM
