
Luxury vinyl tile (LVT) is often sought out because of its high quality and durability, which saves homeowners and businesses money in maintenance and installation costs. It also happens to look great. But some wonder: “Can I install LVT in the shower?”
The answer is yes.
Read on below for some of the key information and tips you need related to shower waterproofing methods and luxury vinyl tile installation.
Whether you are in the middle of a home expansion project or gearing up to gut your current shower, MAPEI’s Shower System 4 LVT includes all the products you need to completely waterproof your new shower and install stunning, luxury vinyl tiles with ease.

A new shower installation (or remodeling project) must be considered as a system. While its individual components are all made to be waterproof on their own, achieving a waterproof shower installation to inhibit water infiltration over the long-term requires the right type of waterproofing membrane.
Without a shower floor and shower wall waterproofing membrane, grout joints can gradually absorb water and lead to water damage, putting flooring, drywall, and even wooden wall studs at risk of water damage and mold growth over time.
Traditionally, shower waterproofing systems revolved around the use of some form of shower pan liner - either rubber or copper shower pan liner - to serve as a waterproofing layer below the mortar base and protect the bathroom subfloor.
The primary issue with this approach is that, over time, shower pan liners can shift or settle, especially if the underlying surface wasn’t properly prepared with the slope or right type of mortar, such as Planislope RS. As they age, shower pan liners may promote the collection and pooling of excess water, leading to mold and mildew growth.
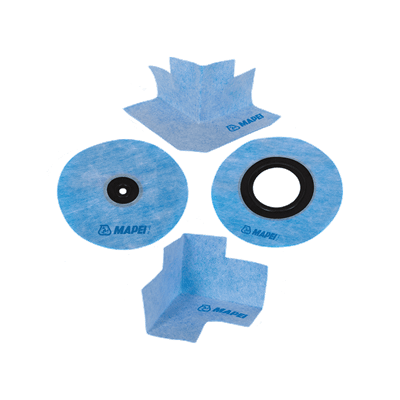
A waterproofing sheet membrane such as the Mapeguard WP 200 is designed to be installed on the surface of the tile backer board and shower base, using either a thin-set mortar or self-adhesive “peel-and-stick” technology. This kind of waterproof membrane requires pre-formed membrane pieces to properly seal corners, coves and drains, all found within the Mapeguard Combo Pack.
Liquid waterproofing membranes are an excellent alternative to traditional tile-liners and sheet membranes. They are roller-applied, adhering directly to the substrate to prevent tiled showers from leaking and causing water damage to your property, meeting or exceeding industry standards for waterproofing (ANSI A118.10 and ANSI A118.12).
Applying a liquid waterproofing membrane formulated for crack isolation, such as Mapelastic AquaDefense, is an easy, fast and cost-effective way to waterproof a shower. Mapelastic AquaDefense is a quick-drying, thin liquid membrane that you can apply with a brush or roller over the installation area to avoid a leaking shower. It dries within 30 to 50 minutes of application, making it ideal for projects with tight deadlines.
Designed to work in unison with Mapesil T, a 100%-silicone professional-grade sealant, and Mapeband rubber-coated waterproofing accessories, this trifecta of products will help you achieve a watertight installation, while saving time and effort relative to other methods.

Before you actually go about installing wall tile or floor tile, you need to make sure that your shower space and bathroom floor is, indeed, waterproof.
When you use a fast-drying product, such as Mapelastic AquaDefense, you only need to wait about 12 hours before performing the flood test.
At this stage, it’s worth a bit of planning and preparation to make sure you have enough materials and that you won’t run into surprises when installing your floor tiles or wall tiles. Uneven cementitious substrates or ceramic surfaces with wide joints need to be smoothed off and repaired using Planiprep 4 LVT.
As a general rule, it’s recommended to have at least 10% more material than you think you need, just in case mistakes are made. Also, preparing a layout plan for your bathroom walls and floors will ensure an efficient installation, prevent tile slivers in awkward spaces and give you an easy-to follow guide.
Following the completion of the flood test, the area will be ready to lay your luxury vinyl tile. Using Ultrabond ECO MS 4 LVT Wall adhesive, vinyl tiles can be installed with or without grout joints. If you opt for grout joints, use traditional grout spacers for the desired appearance of grout lines. The joints must be dry, clean, free of dust and empty. Remember to remove any adhesive that seeps into the joints while it is still fresh.
One of the most important decisions to make to ensure a high-quality finish that will stand the test of time is to use a high-quality grout. MAPEI Flexcolor CQ is a professional-grade, ready-to-use grout that works well with porcelain, ceramic, natural stone and vinyl tiles.
Before grouting with MAPEI Flexcolor CQ, make sure that the adhesive has set. Spread MAPEI Flexcolor CQ over the surface of the LVT with a grout float, making sure that the joints are filled right down to the bottom. With the edge of the same float, remove excess material. Cleaning should begin after the surface develops a dry, skinned-over appearance – within 5 to 10 minutes, depending upon the temperature, humidity and absorption rate of the tile. Use a “clean as you go” approach to spreading and washing this grout, to ensure that cleaning begins before the grout skins over and dries on the tile surface, as it will be very difficult to remove once dried.
After grouting, wait 12-24 hours before applying a protective coat of Mapecoat 4 LVT matte or semigloss finish to seal the joints and provide a non-slip finish to the shower floor.
Subscribe to our newsletter to get Mapei news


![Planiprep 4 LVT [NA]](https://cdnmedia.mapei.com/images/librariesprovider65/products-images/4_3007701-planiprep-4-lvt-1gal_8e0c97792b184786ab0e0de588bc5e6d.tmb-mapei thum.png?Culture=en-CA&sfvrsn=f27f4c7d_4)
![Mapecoat 4 LVT [NA]](https://cdnmedia.mapei.com/images/librariesprovider65/products-images/4_4_3005861-mapecoat-4-lvt-1gal-kit_0e0fe3ff32c447059f446d647fa361dd_e872cb1bfdcb45ad979c150f04e74bc6.tmb-mapei thum.png?Culture=en-CA&sfvrsn=605a4894_2)

![Ultrabond ECO MS 4 LVT Wall [NA]](https://cdnmedia.mapei.com/images/librariesprovider65/products-images/4_1_3000374-ultrabond-eco-ms-4-lvt-wall-1gal_80b09af294f2416a82495136bd5fcad4.tmb-mapei thum.png?Culture=en-CA&sfvrsn=a0a0fbb_6)


Comments
Load more comments